Blogroll

Showing posts with label Snacks And Appetizers. Show all posts

Eggless Chocolate Chip Cookies


          Though I have posted so many bakes on my blog, I realized that I haven't posted the basic Chocolate Chip Cookies. In fact, I have even posted a vegan version of the chocolate chip cookies, but somehow missed these simple cookies. This is an eggless version, I have used curd/yoghurt instead and the cookies came out perfect..

Need To Have

  • All Purpose Flour/Maida - 3/4 cup
  • Butter - 1/4 cup
  • Granulated Sugar - 1/4 cup
  • Light Brown Sugar - 1/4 cup
  • Vanilla Extract - 1/2 teaspoon
  • Curd/Yogurt - 2 tablespoons
  • Baking Soda - 1/4 teaspoon
  • Salt - 1/8 teaspoon
  • Semi Sweet Chocolate Chips - 1/2 cup

Method


          Beat together melted butter and both the sugars. Add the vanilla extract, yogurt and mix.


          Sift the flour, baking soda and salt and add it to the wet ingredients. Now add the chocolate chips and mix everything together and refrigerator for about an hour.
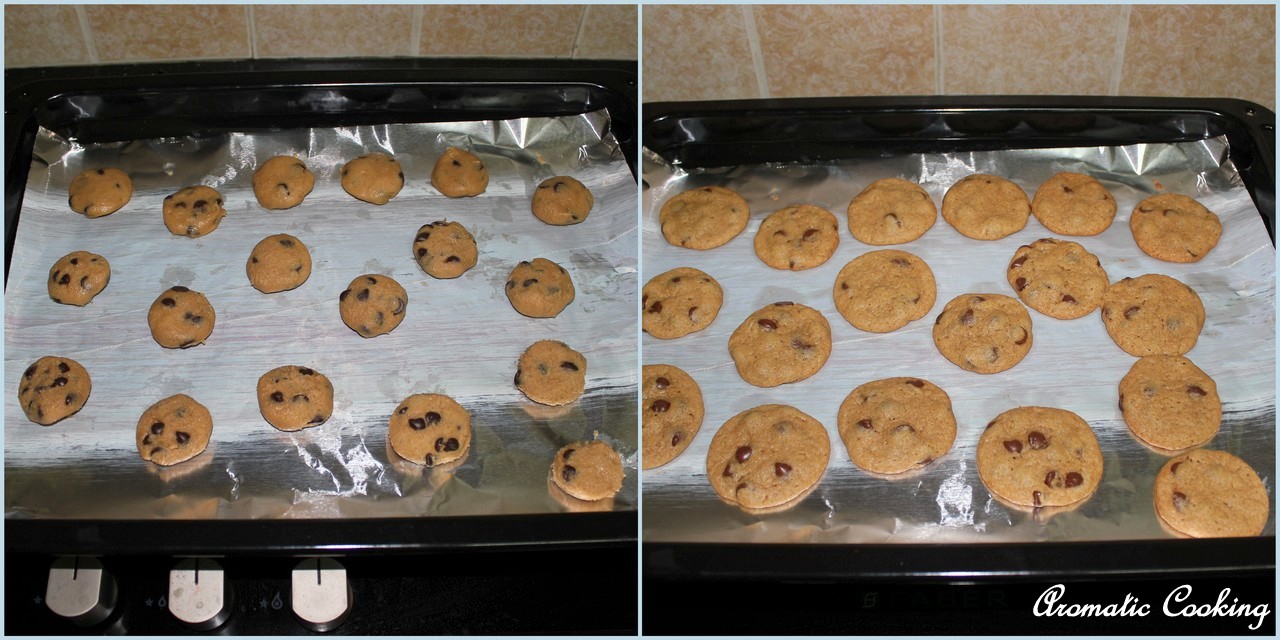

          After an hour, make small lemon size balls, flatten them a little and arrange them on a baking sheet, leaving a little space between the balls. Bake them at 175 C for about 17 to 20 minutes. Remove the baking sheet from the oven, let it cool a bit, then remove the cookies, cool them completely and store.


Note
I have used only all purpose flour, but you can replace half of it with whole wheat flour or even try using just whole wheat flour only.
Layer the baking sheet with aluminium foil, easy to remove the cookies and easy to clean too.

Ribbon Pakoda, Ola Pakoda


          Ribbon Pakoda called otherwise as Ola Pakoda, Nada or Ribbon Murukku, is one of the easiest snack that you can make for Diwali. The dough is simple and there is no particular shape to be followed like the regular murukku, so it's once again a beginner's dish. Just adding the right amount of fat to the dough and frying it properly is all that's required to get good Ribbon Pakodas. I have made it mildly spicy and added sesame seeds for flavor and they came out very crispy, another snack that would go perfectly with a cup of tea or coffee..

Need To Have

  • Rice Flour - 1 cup
  • Gram Flour/ Besan Flour/Kadala Maavu - 1/2 cup
  • Roasted Gram Dal Flour/Pottokadalai Maavu - 1/2 cup
  • White Sesame Seeds = 1/2 teaspoon
  • Red Chilly Powder - 1 teaspoon
  • Butter - 1 tablespoon
  • Hot Oil - 1 tablespoon
  • Salt - about a teaspoon
  • Oil For Deep Frying

Method


          Grind the Roasted Gram Dal into a smooth powder and take 1/2 cup of it. Sift together the rice flour, gram flour and roasted gram flour.


          Add the sesame seeds, red chilly powder, salt, butter and hot oil and mix it together. Adding water little by little, make a stiff dough. Take the ribbon pakoda plate and use it in the murukku press.


          Heat the oil, squeeze out the dough directly in the oil in a circular portion and fry till the bubbles settle down. Remove and drain the excess oil, cool it completely and store it in an airtight container.


Note
The oil should be at a proper temperature, test it by adding a little bit of dough in the oil, it should rise up to the top.
If the ribbon pakoda plate hole is very small, then the sesame seeds might get stuck, in the case avoid the sesame seeds, add some asafoetida for flavor.
You can also grind dried chillies with 3 or 4 cloves garlic, add the paste to the flour and make the dough and make the ribbon pakodas.

Savory Diamond Cuts, Savory Maida Biscuits


          This year, I had made up my mind on a couple of sweets and savory items that I wanted to make, this Savory Diamond Cuts/Maida Kara Biscuits was one among them. I saw them in a couple of blogs, they looked so cute and tempting, and while going through the recipe, I saw that they were not difficult to make, in fact a very easy one that even a beginner can make. These savory biscuits are not very spicy, they have a very subtle ajwain flavor and a perfect match with your tea or coffee..

Need To Have

  • All Purpose Flour/Maida - 1 cup
  • Dried Red Chillies - 5
  • Garlic - 2 cloves
  • Ajwain/Omam - 1 teaspoon
  • Salt - 3/4 teaspoon
  • Oil - 1 teaspoon + for deep frying

Original recipe here.

Method


          Grind the red chillies and garlic with a little water into a smooth paste. Add the salt, ajwain seeds and 1 teaspoon of oil to the flour and mix it.


          Now add the ground paste and adding a little water, make a stiff dough with it. Cover and leave to rest for 30 minutes to an hour. Then divide the dough and roll into big lemon size balls.


          Dusting with some flour, roll out a ball into a thin disc, then cut out diamond shapes, remove them and keep. Do it with all the balls of dough.


          Heat the oil, add the diamond cuts, keep turning them and fry them on medium heat, till the bubbles settle down. Remove the diamond cuts, drain the excess oil and let them cool completely before storing them in an airtight container.


Note
If you fry them on high heat, they brown fast, but might not be crispy.
The chillies that I had were mild, so I added 5, add them according to your spice level, if the chillies are spicy, then even 2 would be enough.
Since I have made a small batch, with just a cup of flour, I just put all the diamond pieces in one plate, but if you're making more, then there is chance that they might stick to one another. But if use more flour while rolling out the balls, then they'll be totally dry and will not stick, but still, don't dump too much on one plate.

Thattai


          Thattai, for the last couple of years , I have been making this for Diwali. There are so many versions of this, we can make it using rice flour in combination with besan flour ( kadalai maavu ) or roasted gram dal flour. But I have been following this method, I soak and grind the rice, then add roasted gram flour ( pottukadalai maavu ) along with other spices and ingredients and make this thattai. It's a simple recipe, using simple ingredients, but it takes some time to flatten the thattais and frying them, especially if you're making a large quantity. The first time I made it, I remember, I had soaked 5 cups of rice and it took me a good 3 hours to finish making the thattais. But other than that, I can say, that this can been made even by beginners, just start with a small quantity..

Need To Have

  • Idli Rice - 1 cup
  • Roasted Gram Dal/Pottukadalai - 1/4 cup
  • Chana Dal/Bengal Gram Dal - 2 teaspoons
  • Cashews -  3 or 4, chopped into small pieces
  • Coarsely Ground Cumin Powder - 1/4 teaspoon
  • Coarsely Ground Pepper Powder - 1/2 teaspoon
  • White Sesame Seeds - 1/2 teaspoon
  • Oil - 1 tablespoon + more for deep frying
  • Salt to taste

Method


          Soak the rice for about 2 hours. Soak the chana dal for about 30 minutes.


          Take the roasted gram dal and grind it into a smooth powder.


          Then grind the rice into a smooth thick paste, using as little water as possible.


          Take the roasted gram dal powder, add the oil, salt, cumin powder, pepper powder, chopped cashews, sesame seeds and mix it, then add the rice paste.


          Mix it together to form a smooth but firm dough, if needed sprinkle some water. Make small lemon size balls and keep.


          Heat the oil for deep frying. Then take a ball of dough, flatten it on a greased plastic sheet, prick it with a fork, so that it doesn't puff up when we deep fry it.


          Then remove it by taking the plastic sheet, inverting it in your hand and peeling the plastic sheet ( the thattai would come out easily). Then slide it into the hot oil and fry it on medium low heat till golden, remove and drain the excess oil on a kitchen tissue. Let it cool completely, then store it in an airtight container.


Note
We can use some coarsely pounded roasted peanuts instead of cashews and also some curry leaves.
We can add a tablespoon of butter to the dough instead of oil.
If your dough is sticky, because you have added more water while grinding, then add some rice flour and roasted gram dal flour to make the dough.
While deep frying, add it to the hot oil, but cook it on medium low heat, till all the bubbles die down, in fact leave it for a few seconds even after the bubbles die down, otherwise the thattais will be crispy at the edges and might be soft in the center.
The thattais were a light golden color, since I have added only pepper powder, it would get more color, if we added chilly powder instead of pepper powder.

Payatham Payaru Sweet Sundal, Moong Bean Sweet Sundal


          This Payatham Payaru Sweet Sundal had been on my do list for a long time, finally I did it today. This is again a simple recipe, the only part that has to been taken care is cooking the moong beans perfectly, they should be cooked well but at the same time not mushy. We add a little jaggery to give a slight sweetish taste to the sundal, other than that, everything else is like the regular sundal..

Need To Have

  • Moong Beans/Payatham Payaru - 1/3 cup
  • Grated Coconut - 2 to 3 tablespoons
  • Jaggery Powder - 4 to 5 teaspoons
  • Urad Dal/Husked Black Gram - 2 teaspoons
  • Mustard Seeds - 1/2 teaspoon
  • Asafoetida - 1/4 teaspoon
  • Dried Red Chilly - 1
  • Curry Leaves - 6 to 10
  • Salt to taste

Method


          Soak the moong beans overnight and pressure cook it with salt and just enough water to cover the beans, for just one whistle, the beans should be cooked but not mushy. Drain the beans if it has some water left in it.


          Heat some oil, add the urad dal and mustard seeds, when it starts spluttering, add the dried red chilly and asafoetida followed by the curry leaves and mix for a few seconds.


          Add the cooked beans and mix for a couple of minutes, finally add the jaggery and grated coconut and mix for another minute or two and remove.


Note
Though I have pressure cooked the beans, I would say it's better to cook the beans in a regular pot, you can be sure that the beans are cooked to the correct level, without becoming mushy.
I have used organic jaggery powder, if the jaggery is not pure, then melt the jaggery in a little water, strain and cook the syrup till thick and then add it to the sundal.
You can add even 2 or 21/2 tablespoons of jaggery, I limited to 4 to 5 teaspoons, since I was not sure whether my family would like it very sweet.

Sweet Corn Sundal


          Sweet Corn Sundal, this is such an easy and delicious dish. Actually today I had planned to make another sundal, but the dal got overcooked, so I had to put it aside for some other use. When I was thinking about what other sundal to make, I remembered that I had some fresh corn lying in the refrigerator. The sweet corn was really very fresh and good and it tasted so juicy and delicious in the sundal. You can have it as a sundal or salad or even as a side dish with rice and dal too..

Need To Have

  • Fresh Sweet Corn - 1
  • Grated Coconut - 2 tablespoons
  • Mustard Seeds - 1/2 teaspoon
  • Urad Dal/Husked Black Gram - 1 teaspoon
  • Green Chilly - 1
  • Dried Red Chilly - 1, broken into halves
  • Asafoetida - 1/8 teaspoon
  • Curry Leaves - 6
  • Salt to taste

Method


          Remove the outer husk and the inner silky threads from the sweet corn, clean it and wash it well. Pressure cook it with some water for 4 whistles. Let it cool a little, then remove the kernels from the cob using a knife or a corn kerneler, it came to about 3/4 of a cup.


          Heat some oil, add the urad dal and mustard seeds, when it starts spluttering, add the asafoetida and red chilly, mix twice, then add the green chilly and curry leaves. Mix it for a few seconds, then add the corn kernels and salt and mix it well till all the moisture is almost gone.


          Add the grated coconut and mix it for half a minute and remove.


Note
The corn that I had was really good, but if the corn doesn't have the slight sweetish taste, then add 1/2 teaspoon of sugar.
Don't add salt while cooking the corn, that makes the kernels tough.
Also you can cook the corn in a regular pot too.
Removing the kernels from the cob is easy to do even with a knife, hold the corn upright tightly and slice the kernels with the knife.
The sundal will not be too dry, it will be juicy and that's how it should be.

Baby Corn - 65, Baby Corn Fry


          Baby Corn Fry or Baby Corn 65, this has been on my do-list for a long time and I made it finally. The first time, I made a shallow fry version, it came out very well and tasted very good too, the only thing lacking was the crispiness from deep frying. So the second time I tried the deep fried version and I got the expected crispiness. It's a simple recipe, adding some common spice powders to boiled corn, mixing it well and then deep frying them. It can be served as a side dish with rice and dal for lunch or as a tea-time snack..

Need To Have

  • Baby Corn - 15 or 16
  • Turmeric Powder - 1/4 teaspoon
  • Red Chilly Powder - 1 teaspoon
  • Roasted Cumin Powder - 1/2 teaspoon
  • Garam Masala - 1/2 teaspoon
  • Ginger Garlic Paste - 1 teaspoon
  • Lemon Juice - 1/2 teaspoon
  • Besan flour/Gram Flour - 1 tablespoon
  • Rice Flour - 2 tablespoons
  • Curry Leaves - 10
  • Salt to taste 
  • Oil for deep frying

Method


          Boil the corn for 15 minutes, drain and keep. Add the rice flour, besan flour, turmeric powder, red chilly powder, roasted cumin powder, lemon juice, ginger garlic paste, salt, mix everything well ( if needed sprinkle little water ) and leave it for 10 to 15 minutes.


          Heat the oil, deep fry the corn till it turns crispy. When you're frying the corn, add the curry leaves, fry it along with the corn and remove. Drain the excess oil, serve it topped with curry leaves along with sliced onions.


Note
Spread the paste well all over the corn.
Serve it hot, it'll loose the crispiness when cold but it'll still taste good.

Rajgira ( Amaranth ) Ladoos

       
          Rajgira ( Amaranth ), I have been reading about this seed, so much on the web for so long, but only recently I bought a pack of this nutritious grain. Though you can read about its nutritional value on the web, let me give a brief information about it, since this is the first time I am posting something with it on my blog. It's gluten free, it's high in protein, magnesium, potassium, phosphorous, iron and has twice the calcium as milk. It's the only grain that has Vitamin C and has all the 9 amino acids needed by the body. It's good for the eyes and for you ladies ( men too ) out there, it's very good for the hair. This grain/seed is not used in the Tamil cuisine, at least as far as I know, but it's widely used in North Indian cooking, the seeds are popped and made into ladoos, chikkis or kheer and the rajgira/amaranth flour is used to make rotis and parathas. Since, I had bought the seeds, I thought I'll try out the ladoos, we can't make the ladoos with the raw seeds, they have to be popped first. Popping the seeds needs a little patience and time, once the seeds are popped ( you also get popped rajgira ), then the ladoos can be made in no time. To start with, I popped just 1/3 of a cup of these seeds and made the ladoos. They turned out really good, tasted nutty but very, very light when compared to sesame ladoos..

Need To Have

  • Rajgira Seeds/Amaranth - 1/3 cup
  • Chopped Cashews - 1 tablespoon
  • Raisins - 1 tablespoon
  • Ghee/Clarified Butter - 1 tablespoon
  • Jaggery - 1/2 cup

Original recipe here.

Method


          Heat a heavy bottomed pan, add the seeds a little at a time ( a couple of teaspoons ), you'll see it popping ( just like sesame seeds ). Immediately cover the pan with a lid, let the popping stop, then remove it immediately before it starts to brown. If you don't cover it with the lid, then the seeds are going to pop all over the place. Do the same with all the seeds and keep.


          Sieve the popped seeds ( using a fine sieve ) to remove the seeds that have not popped. Add the cashews and raisins to the popped rajgira.


          Heat the ghee, add the jaggery along with a tablespoon of water and let it to melt. then remove it when it starts bubbling up.


          Pour the jaggery syrup ( strain it, as shown in the picture ) over the seeds and give a quick mix with a spoon. Then while it's still hot ( of course, bearably hot ), wet your hands with water and shape out ladoos. Let the ladoos cool for 3 to 4 hours at room temperature, then they can be stored for about a month.


Note
As per the original recipe I should have added only 1/3 cup of jaggery for 1/3 cup of the seeds, but I found it difficult to shape the ladoos. Also I read that there is a special jaggery to make these ladoos and chikkis.
I just got 12 to 13 small ladoos, so we got it done within a week, but it should stay good for a month,
Figure out the heat at which you have to keep the pan for popping the seeds, I used a small omelette nonstick pan, so I reduced the heat completely while popping the seeds.
Wet your hands with water before shaping each ladoo.

Banana Blueberry Oats Cakes ( Microwave Recipe )


          Couple of months back, my husband on his trip to the US, had bought me two big packets of dried blueberries. Now, I have to find ways of using the berries, apart from eating it alone or with cereal ( with a family that's not a big fan of cereals ). I was browsing the web for blueberry recipes, I also I had bananas with me that day, so I was looking for a recipe to use blueberries along with bananas, then I saw this here. An easy dish that takes just about 4 to 5 minutes in the microwave, great for breakfast or snack..

Need To Have

  • Quick Cooking Oats - 1/2 cup
  • Banana - 1 big
  • Dried Sweetened Blueberries - 3 tablespoons
  • Cinnamon Powder - 1 teaspoon

Method


          Peel and mash the bananas, mix in the oats, blueberries and cinnamon powder.


          Grease a microwave safe dish, add the oats banana mixture, smooth it out with a spoon and microwave it for about 4 to 5 minutes till dry. Cool it for a few minutes, take it out and slice.


Note
The original recipe used fresh blueberries, they are not readily available in India.
Fresh berries don't have any taste, so 1/4 brown sugar is added.
The texture will be on the chewier side.

Vendaya Paniyaram, Fenugreek Paniyaram


          We love Paniyarams at home, both the sweet and savory versions, I have posted a couple of them in my blog too. Usually we use the leftover idli/dosa batter to make the savory paniyarams, we add some sauteed onion, chillies to this batter and make the paniyarams, today also for these Vendiya/Fenugreek Seeds Paniyaram, I have used leftover dosa batter, but in a slightly different way. This is a friend's recipe, she made this for me once along with some Puli Chutney ( will post it next ), hot, hot paniyarams with that chutney was simply too, too good. As usual, I got the recipe from her and tried it out, it came out really well, do try this out, the next time you have some dosa batter left..

Need To Have

  • Idli Rice - 2 cups
  • Fenugreek Seeds - 2 teaspoons
  • Leftover Dosa Batter - 1 cup
  • Onion - 1 medium, chopped
  • Green Chillies - 3, chopped
  • Curry Leaves - 15 - 20
  • Chopped Coriander Leaves - 1/4 cup
  • Salt - 1 teaspoon

Method


          Wash and soak overnight, the idli rice along with the fenugreek seeds. The next day morning, grind it well into a smooth paste in a blender.


          Remove it, add the 1 cup dosa batter and the teaspoon of salt and mix it well, cover and leave it to ferment. If you have mixed the batter at about 9:30 in the morning, let it ferment till the next day 9:00 am.


          Then add the chopped onions, chillies, curry leaves and coriander leaves and mix it well, it should be like a slightly thick pancake or dosa batter and grease the paniyaram pan as shown in the picture.


          Spoon out the batter, cover and cook till the top looks cooked and the bottom turns golden, then flip it, add a little more oil and cook on the other side too. Remove and serve it warm with the chutney of your choice, I served it with the Puli Chutney, will post it next.


Note
The batter has to ferment really well, you won't see the batter rising, as in the case of idli batter, but when you make the paniyarams, you'll see the batter bubbling, that's the sign that the batter has fermented well.
I stay in Bangalore, so I let it fermet for almost 24 hours, if you are staying in a very hot place, then you can reduce this time by 4 to 5 hours, but a little longer than for the regular idli batter.
I have given here as dosa batter specifically, most of us know idli batter is slightly thicker than dosa batter, and also leftover dosa batter would be slightly more fermented than the fresh idli batter.
We're not adding urad dal for fermentation, the dosa batter is the one which does that work.